
Now that we have seen most of the major functions and elements which are important from the setup point of view, we can now create a new client.
- To create your client/user, go to My Clients tab.
- Click on the “Create Client” button on the extreme right
- The first tab you will see is the Account Information form and the second tab, Billing Information will allow you to add Credit information about the user you are going to create.
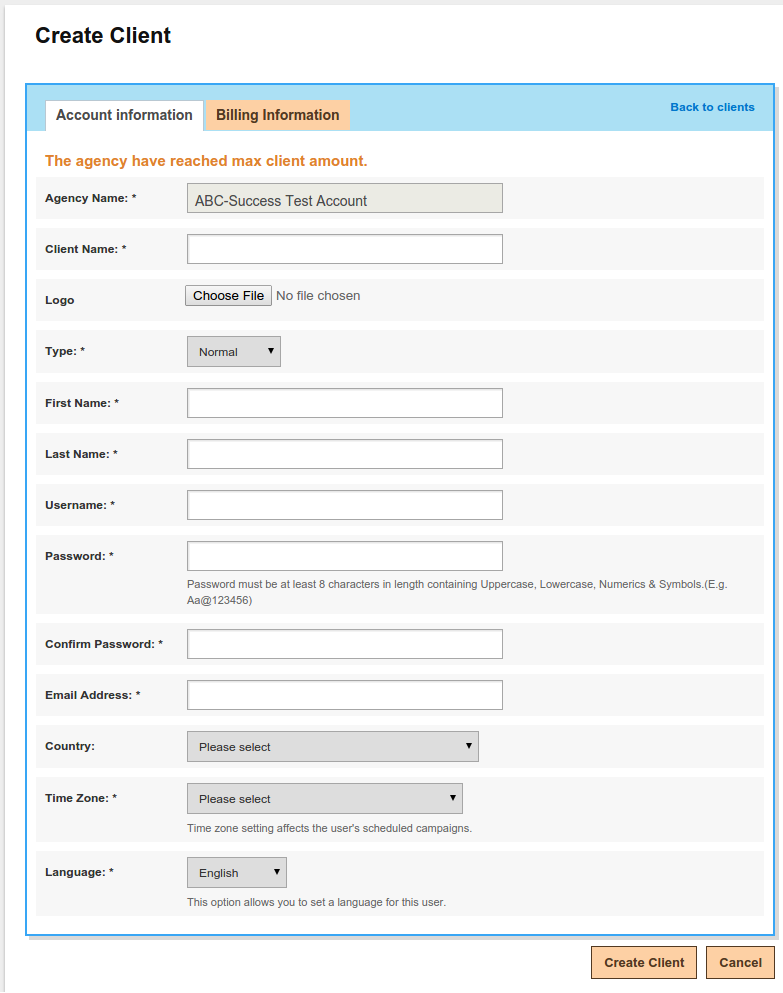
Account Information
Agency Name:
Select the user group for your user, the selected group’s limits will be applicable.
Client Name:
Enter the client name of the user
Logo:
Upload the logo of the user
Type:
choose the type of the user
Firstname:
Enter the first name of the user
Lastname:
Enter the last name of the user
Username:
Enter the desired username for your user
Password:
Enter the password for the user
Email Address:
Enter a valid email address
Country:
Select the country of origin
Timezone:
This is a very important parameter and you must remember that the correct timezone selection is crucial for the user as the campaigns scheduling will depend on the same timezone. If you choose the wrong timezone the scheduling of the campaigns will generate unwanted results.
Language:
This option will allow you to set the language for the user, by default MailsDaily comes with a single language (English).
Credit Limit Per Month:
You can set a monthly credit limit for your client. The client account will not be able to send out any more emails once the limit has been reached for each month
Credit Limit Per Campaign:
You can set a per campaign credit limit for your client. The client account will not be able to send out any more emails once the limit has been reached for each campaign
One Time Credit Limit:
You can set a One Time credit limit for your client. The client account will not be able to send out any more emails once the limit has been reached
Credit Threshold:
This is to set credit’s threshold for your client. The system will send a notification to you if available credit of client is lower than his credit threshold.
When you are done adding the above information – simply hit the “Create Client” button found at the bottom of the screen.